GMC 710 AUTOPILOT PANEL
Ordered before December 1st 2024.

QUICK INSTALLATION CHECKLIST
▼ Tap on item to expend ▼
1. Mobiflight Connector
INSTALLED
1. Mobiflight Connector
INSTALLED
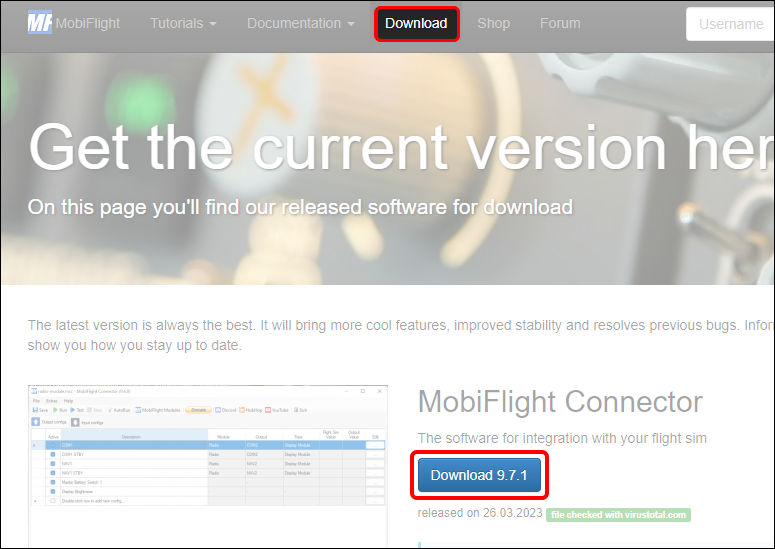
- Open your web browser and navigate to the Downloads section of the official MobiFlight website.
- Download the latest version of MobiFlight.
- Once the download is complete, run the installer file (.exe) and follow the on-screen instructions to complete the installation of MobiFlight on your computer.
- Don’t miss to create a shortcut on desktop if you want to.
2. USB and power supply
CONNECTED
2. USB and power supply
CONNECTED
- Take the USB cable provided and connect one end to a USB port on your computer and the other end to the USB C port at the back of the panel.

3. Software config file
LOADED
3. Software config file
LOADED
- Launch MobiFlight Connector. It will start by scanning the connected modules.
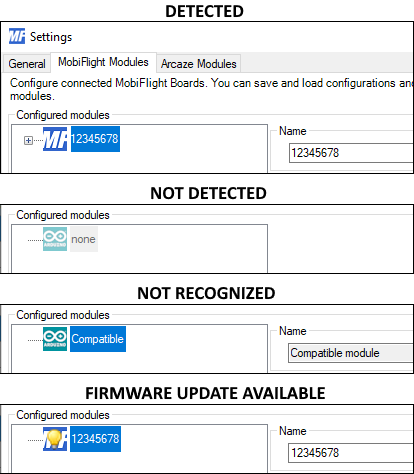
- In the main window of Mobiflight, click on Mobiflight Modules and check that the CCP-DCP-CL650 module is correctly detected.
- Try to disconnect and reconnect the USB cable.
- Close and reopen Mobiflight. It may be minimized in the taskbar.
- If others peripherals are connected to COM ports it can result on a conflict so try restarting the computer.
- Try to disconnect and reconnect the USB cable.
- Close and reopen Mobiflight. It may be minimized in the taskbar.
- Check if other COM ports are currently in use. If yes, retry once these devices are inactive.
- Restart the computer with the panel connected to allow the computer to initialize the COM ports.
- Download the desired Software config file below and unzip it :
- X-Plane 12/11 :
- MSFS :
- Go back to the main window, click on File > Open, select the software config file (.mcc) downloaded before and press Open.
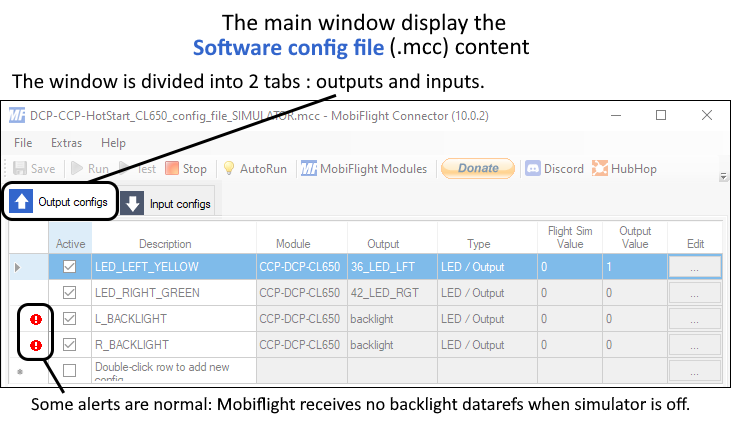
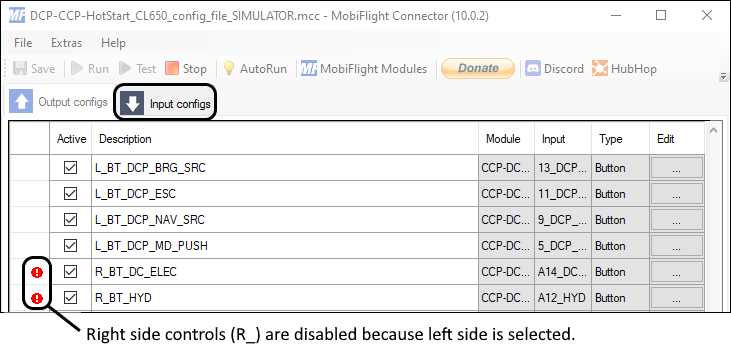
- Overview example (DCP & CCP panel in this case) of the main windows :
- Press the Run button to enable Mobiflight talking to the simulator and activate the AutoRun button so the loaded config will run automatically at each MobiFlight start-up.
- In the main MobfiFlight windows go to Extras > Settings > General tab, enable Logging then press OK.
- The main windows now display a log in the bottom. Check to have Run enabled.
- Test toggles, each actions should appears in the log window. In the example below, it refers to the DCP & CCP panel, but it works the same for this product.
- AUTO (default) :
Automatically adjusts backlighting to ambient brightness.- Press HDG rotary selector for 2 seconds to active
- MANUAL :
Adjust the desired backlighting level manually.- Press and hold CRS1 rotary selector
- Adjust backlight level using HDG rotary selector
- Release CRS 1 rotary selector
- SIMULATOR :
The backlighting level is synchronized with an aircraft setting in the simulator.- Press ALT rotary selector for 2 seconds to active
▼If you have “Orphaned Serials Found” message▼
▼If you have “Orphaned Serials Found” message▼

▼If not detected▼
▼If not detected▼
▼If not recognized▼
▼If not recognized▼
The panel is already uploaded with the firmware so during the initial installation, this most likely indicates a conflict detected with other COM ports.
▼If firmware update available▼
▼If firmware update available▼
A manual for the key layout is included when available.


For more informations please check the system overview below

4. Hardware panel
TESTED
4. Hardware panel
TESTED

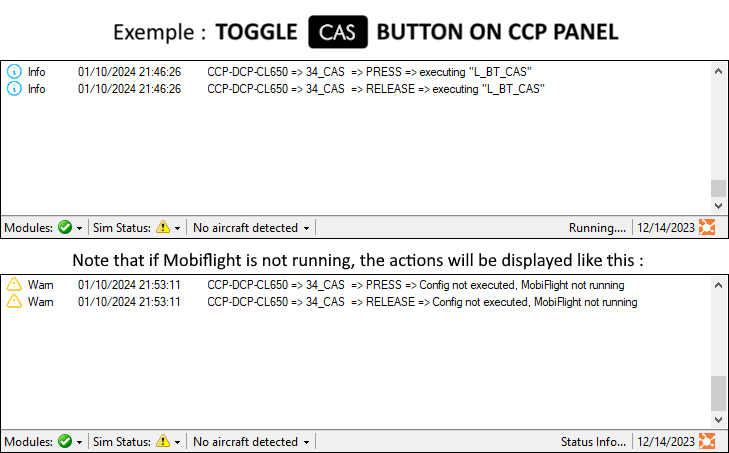
If the actions continue to display like above despite Mobiflight running, please refer to item C. Orphaned Serials Found in the SUPPLEMENTALS PROCEDURES.
5. Backlighting
CHECKED
5. Backlighting
CHECKED
The backlighting is powered via the USB-C cable. There are three modes for controlling the backlighting. You can easily switch between backlight modes using the Keys combinations below.

CHECKLIST COMPLETE
FLY
SUPPLEMENTALS PROCEDURES
▼ Tap on item to expend ▼
A. Multiple hardware modules
MERGED
A. Multiple hardware modules
MERGED
MobiFlight can only use one config file at a time. For this reason, to use multiple panels, you just need to merge them.
- Download the config files of the various modules from their installation page on the website.
- From the main window of Mobiflight, click on ‘File’ then ‘Open’, and select one of the config files.
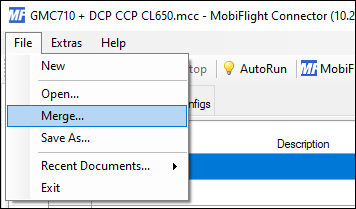
- Click again on ‘File’, then select ‘Merge’, and choose the second config file.
- The two config files have been merged. Repeat the operation with other config files if necessary.
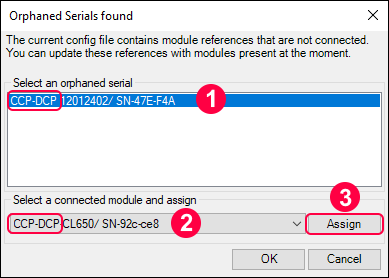
- If the orphaned serials window opens, assign the orphaned serials to their respective module by selecting them and then clicking on ‘Assign’.
- The config files are now merged, and you can use all your modules at the same time.
- Save this configuration with a different name by clicking on ‘File’ then ‘Save As’.
- LINKED CONFIG

B. Firmware
UPDATE
B. Firmware
UPDATE
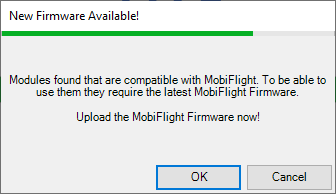
The Mobiflight firmware is by default installed into the panel but if you need to upload it again after a reset or if an update is avaiable, please proceed as follows :
- Be sure to have the panel connected and launch MobiFlight Connector. It will start by scanning the connected modules.
- MobiFlight will detect an eligible panel connected and need the firmware installed in order to communicate with it.
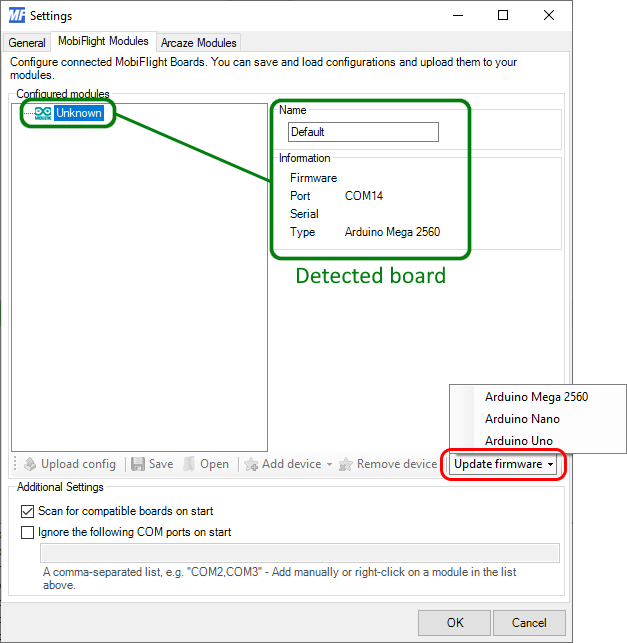
- In the main MobiFlight window, go to Extras > Settings > MobiFlight Modules tab. Select the detected board that you want to update, press Update the firmware and if asked choose the board type.
- DCP-CCP panel board type = Arduino Mega 2560
- Firmware is successfuly installed. Now to upload a hardware config file (.mfmc) please refer to HARDWARE CONFIG FILE – UPLOAD checklist below.

For more informations please check the system overview below

C. Hardware config file
UPLOAD
C. Hardware config file
UPLOAD
The hardware config file (.mfmc) is uploaded by default on the hardware panel but if you need to upload it again after a reset or a change, please proceed as follows :
- Download the hardware configuration file below : GMC710_hardware_config_file.mcc
- Be sure to have the panel connected and launch MobiFlight Connector. It will start by scanning the connected modules.
- If MobiFlight detect an eligible hardware panel without firmware installed, please refer to the FIRMWARE – UPDATE checklist above.
- On the main MobiFlight windows press the MobiFlight Modules or via menu Extras > Settings and MobiFlight Modules tab.
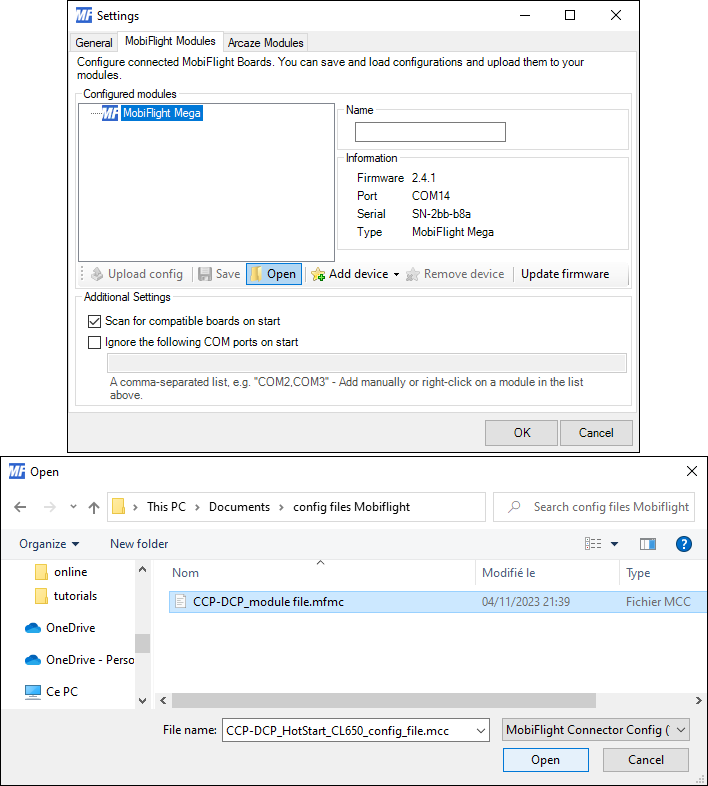
- Once on MobiFlight Modules tab select the board to which you want to upload then press open and select the desired hardware config file (.mfmc) and press Open.
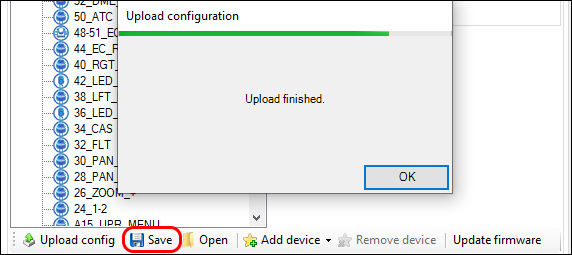
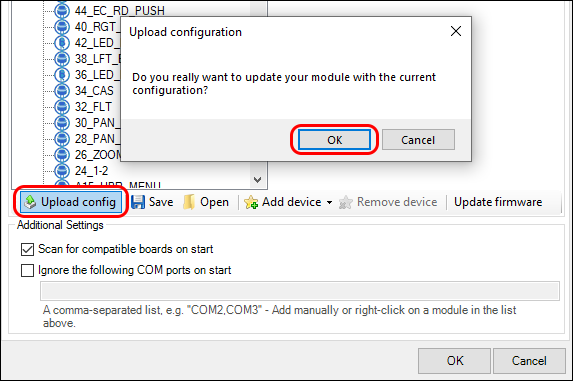
- Press Upload config and confirm by pressing OK.
- The hardware config file (.mfmc) is now successfuly uploaded. Don’t forget to Save if you made any change.


For more informations please check the system overview below

D. Orphaned Serials Found
MERGE
D. Orphaned Serials Found
MERGE
It’s means that the loaded software config file (.mcc) was paired with an other hardware . It could happen if you had reseted the firmware for example. To merge them, proceed as follows :
- In the main MobiFlight windows, go to Extras > Manage orphaned serials
- Check that the Orphaned serial name match with the connected module name and press OK
- Now the loaded software config file (.mcc) is assign to the connected module.
- In the main MobiFlight window click on SAVE to keep changes.

For more informations please check the system overview below
